Showing posts with label around the house. Show all posts

March 1, 2011

Something so simple into something so adorable

Who would have thought that this simple dresser could turn from this...


to this........What a simple way to change something you already have to some thing amazing.....
The Scrap Shoppe

I can not wait to try this on some old furniture. Thanks for inspiring me Michele

September 3, 2010

Use Vinegar for All Your Health and Beauty Needs

Came across this very interesting article about Vinegar.

More uses than I realized. If you looking for an interesting read take a minute and read this. Use Vinegar for All Your Health and Beauty Needs It might help out with thing you never knew it could!

August 19, 2010

PeRsOnAliZeD Subway Art

Have you seen theses?They are GREAT! What a cute way to personalize something special.
If it be a person, places you've visited or something that means the world to you. (family)oh so clever!
I bet you are wondering where I came across these creations....
at According to Kelly
She has tips on how to do it right so go check it out. HERE
Here is my two favoritesThank you KELLY!

June 29, 2010

baby doll wants one too!

Do you remember my previous post, of my little girls Dream Room? HERE
Well I knew that there dolls would want one too! I made the little blankets with the scraps from there quilts. Don't look to close I had to use some uneven fabric pieces to make them work. Oh well the girls love them and so do there dolls.

June 21, 2010

The grass is always greener when its fake!

I came across this very cute blog
Ready, Set, Create

and I am so going to try this project.

So easy and great impact for such a small cost.
Go to Aleesha's post HERE for details on how to create this fun project.

June 15, 2010

Button and Piping Pillow

Oh I can't wait to try this one!
I've been in the works of redecorating my bedroom and I think I'm going to be making one of these.
Check out how over at
make it and love it
HERE
There is a tutorial of how to put it together...PERFECT!
You have to check out Ashley's website....oh so cute with many wonderful ideas.

Thank you Ashley for all your wonderful ideas that inspire me to make more fun things!


May 25, 2010

Door Wreath

My New Door WreathMade with Lima Beans!
I LOVE IT!
I recommand this project for those who have time. The out come is GREAT but it takes a lot of time to glue each lima bean to the wreath.
Time to create 4-5 hours (not done all at once) Cost $14, Lima beans 2 pkgs, foam wreath & ribbon.


May 18, 2010

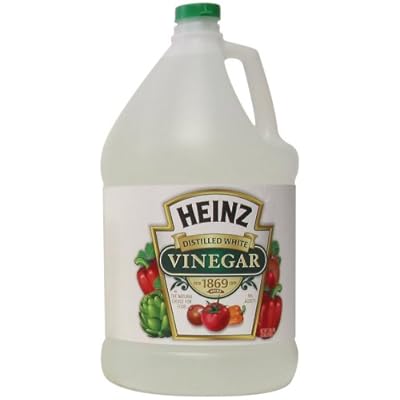
Tips for cleaning with Vinegar


Did you know that you can do more than cook with Vinegar? Check out the link for 25 ways to clean with vinegar. Some might amaze you!


May 17, 2010

Dreams for SWEET Girls!

It all started with this....LOVED the colors and I know if I didn't buy it I would forget what the colors where plus I would have never put all those colors together.....Great dollar store find!
Then found this and had to make a dream come true for two sweet girls.
I didn't decorate their cribs when they were babies but loved the unusual quilt look. Not the normal square pattern.....SO I came up with my own design. Mapped out the layout of each fabric color and made sure each fabric had a big square or splash of color.

Finished Product!
They are the same pattern but different fabric in the squares/rectangles so both quilts are different but similar.
Went old school on the back....Brown twin sheet and tied with ribbon.Left over scraps of the fabric made each of the pillows. No longer a little girls room but not quite a teen, thank goodness!

May 10, 2010

Have you checked out SYTYC??


Do you know what it is?
Missy at So You Think You're Crafty
has a fun filled blog and I came across this really cute Travel First Aid Kit.

Apparently she has auditions for spots to be in different sessions on her blog, I'm guessing but not quite sure....she shared this really creative Travel First Aid Kit.
Check out her blog at www.soyouthinkyourecrafty.blogspot.com

May 8, 2010

Call me CrAzY or Organized!

Anytime I've got leftover scrap pieces of paper I organize them. In the past I kept them all in a box and it was a big mess but I knew I didn't want to get rid of these scraps. Then a thought came to me organize them by color and in an accordion folder. He's how it turned out....
..now I don't worry about my kids getting into my scrapbooking supplies because they know they can always check my scrap folder for anything they'd like to use.

May 7, 2010

Book Page Markers

This little pouch holds my new book page markers I made the mini bookmarks to hold place of things I wanted to create in books I've gotten from the library. I decided to use numbers to be able to mark the order of things I'd want to make.They work out perfect instead of the torn pieces of paper I've been using in the past.
and this cute little pouch to hold them all is perfect and adorable.
So simple - Left over scraps of paper and the use of my Cricut. Hardly no time at all, 10-15 minutes

May 1, 2010

Tulips, Tulips, Everywhere....Loving IT!

I just have to share my tulips.....I love spring not just because my birthday is usually around the first of spring but the flowers that come up year after year. Thanks Mom & Dad for the purple and pink mixture of tulips for my early Christmas gift but it sure felt more like a birthday gift. Man I love spring!
I absolutely L-O-V-E my dark purple tulips.....and so does my neighbor, she said she if they where missing don't look at her house.....gotta love it.

April 24, 2010

A solution for puzzle boxes

My children and there friends love to do puzzles but we have a problem with some of the boxes. Which I can not stand puzzle boxes that the kids have torn into. We have taped and taped and taped and I can't do it any more. Now you have to understand they are 2-5 year old opening boxes and yes some of the boxes are hard but please kids stop ruining the boxes.

So here's my solution.....take a sandwich size container and change it to this....

I decided to cut up the original box and use packing tape to attach the puzzle picture to the top of the box.
Then added the side picture to the inside of the container so I could see what puzzle it was on the shelf. Then since there was two puzzle pictures I added another picture on the inside of the container. Just in case....two kids where working on the puzzle and both needed to see the picture or possibly just in case if we lost the lid we still had the picture inside.
My kids really liked the idea. I'm curious how long they will last, hopefully no kids thinks to step on the container. Man I would be sad =(

Cost was the containers - they came in a 4 pack for $2.33 @ Wal-Mart, packing tape had on hand. Time to create 15-25 minutes (had children helping)

April 23, 2010

Discovered Style on a Recipe Box

I love my new Recipe Box

Check out the where I got the design idea at

http://www.sistersstuff.blogspot.com/2009/08/recipe-box.html

When out on my adventure in blog world I came across this amazing blog Sisters Stuff,
http://www.sisterstuff.blogspot.com/ and when I saw their home page with the cute box I remembered I purchased that same box (at Robert's Craft in Utah) and haven't done anything with it yet. It had a ding in the corner but the paper covers it great.I heart ribbon! My girlfriend and I share ribbon all the time so next time you need something ask a friend.To bad the handle wouldn't stay up so I had to get creative to make it stay to take the picture. I took a paper clip & bent it to hold up the handle to take the picture.The tabs/dividers for inside the box.Do you recognize what I used to make the dividers?Old Manila folders!


So thanks to Sister Stuff for challenging me to get projects done. Here's my version of the Recipe box. The inside of the box is still a work in progress, the recipes I mean and they probably will be for the next year.